Friday, December 31, 2010

LOOKIE!

Lookie what my hubby made for the store! Two stages for the window displays so everything sits level to the bottom of the windows! They slide out if necessary, too! 
I know, not the greatest photos in the world, but just had to post some progress and this is all I have right now.


Monday, December 20, 2010

TRIM'S UP

BEFORE:
 
Next is a photo I missed when I was showing before photos in my earlier posts. You can see the white door here and how much nicer it looks in three colors in the after photos! It was a very sunny day when these before photos were taken, I would LOVE to see that sunshine again! It's been so cold & gloomy here for weeks.
While the yellow cupboard could have been repainted, the practical value of the piece was virtually nil for us, so sadly, we removed it. (It was not original to the building, but added later.) Sorry to those that think it should have stayed. Behind it was the original beaded boards to the building (tongue & groove), so we decided to put beaded board around most of the room. Sorry to admit the new is paneling, but at least it keeps the flavor original to the building.

AFTER:
The trim's up in the front, so here's some photos where things are looking more finished than before. We are going to faux paint the floor where the blue & white tiles are missing and hope no one really notices much! I'm taking volunteers for floor washing & waxing! It's all ready now for that mop & glo treatment! It sure has lost what sheen it had with all the work we've been doing, but that certainly is curable!
 We are looking for a door to put on the inside of the entryway so we can get rid of the storm door. We had taken it down, but with the temperatures being so extremely cold this month, we put the ugly door back up and know we have to find something to replace it for the winters. We were going to rip out that entire entry cove, but believe it was originally built this way in 1873, so we decided to leave it intact.
While the brown walls darken the room and make it seem smaller in the photos, we really like how it turned out in person. It's very warm & cozy feeling and will make a great neutral background for the primitives to come!

Friday, December 17, 2010

TAKING SOME SHAPE

FIRST, the project manager & top boss:
She is demanding a good floor mopping!
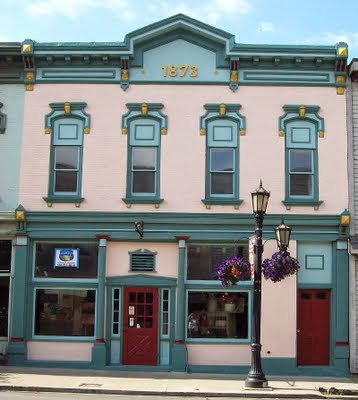
PROGRESS PHOTOS:
 I forgot to take a before picture of this door, it was all white before. It is non-functional at this point, but we may open it up to take you to the upstairs one day.

The "before" (left) photo shows just a small section of how bad the entire ceiling looked.
AFTER: These photos hardly does justice to the ceiling now! Simply gorgeous!!! I think the ceiling is the reason I bought the place!
We put a board over this doorway (above) to keep the heat in the front section, I promise it won't look like this later. :)
BEFORE: Here's a section from the back of the building shown to the right that has been getting a little face lift.

 AFTER (sort of): After I painted the wall, hubby decided to spray paint the tin ceiling and it oversprayed onto my hard work! Painting those bricks wasn't easy, the dips and pits are incredibly hard to coat with paint. Oh well, nothing some touch up won't cure. :)
The ceiling back here is actually small squares of tin, nothing fancy like in the front of the building. This is the only section in the building that will have brick walls. The rest of the room will be given the painted beaded board touch.
The rest of my photos today are more pictures from the back of the building where we have done virtually no work so far. I've posted them just so you can see how much needs to be done and maybe you can start picturing something better until we have the work complete.
 The deep fryer for donuts used to be located here. Looks pretty bad right now.
 Here in the back section of the building, we are looking from the back towards the front. The oven on the right (yes, still here) needs a home! We have a possible buyer for it coming after Christmas. Please pray with us that this person will want to buy it and use it again as it still works.
 As I understand, this little room is where they put the dough for rising in the later years of the bakery. We believe it was a freezer once upon a time, but was no longer used for that. There's a big walk-in freezer in another section that took its place. Below is the inside of this room, minus the racks and shelves that were in there when we purchased. I may rent this out as small space if we can get the old refrigeration unit safely removed.
Be sure to keep coming back. More photos coming soon!


Friday, December 3, 2010

BEFORE . . . . .

OK, I'm home today, for a change, and am posting some of the "before" photos of the building. Can't wait until we have the "afters" to post!
This is the "front" section of the building, looking towards the street & store entrance. I'm not real excited about a blue & white floor, but will have to use rugs as I cannot afford a new floor at this time.
Here's hubby working on the one doorway to the back. Notice the peeling paint on the beautiful tin ceiling! It will get painted with a fresh coat of white gloss paint after scraping!
The back room has TWO old skylights! There's plastic covering the opening here, which will go! Gonna be awesome!!!
Here's a section in the back room. The roll arounds have been removed, but you can see this place needs a lot of TLC! There's a tin ceiling here, too, but it's small squares, covered in grease from the bakery days. Gonna be a job to get them painted, but gloss white is coming soon!
Anyone need an oven? This one is sure to hold everything you could ever want to bake at one time! hehehe! Not sure how many bread loaves it holds on the rotisserie, but I'm not even a little interested in using this. Yes, we'd like to sell it and hoping to find a buyer. Lots of bread was baked in this oldie but goodie! Still works!!! Come & get it!!!!!!!!!! Price is CHEAP!!!!!!!!!!